Showing posts with label decorating. Show all posts

Wednesday, May 4, 2011

embellished frames

I have enjoyed making these embellished frames using beautiful scrapbook paper and embellishments. Awhile back I made this frame for Haley's (my friend Kristin's daughter) first birthday. I thought the phrase Celebrate Happiness worked well for this occassion and could also be appropriate for any kind of picture. I know it will look very cute displayed in her room with a picture from her first birthday party!


I recently made this larger 12 x 12 frame for my friend Katie who had baby # 2 today! (cannot wait to meet baby Anneliese!) Katie is decorating a shared room for her first daughter, Madeline and Anneliese to share with cheery floral and paisly bedding from Pottery Barn. I absolutely love how this frame turned out and was delighted when Katie and her hubby Ryan liked it too. I  got to see it in the room and was so happy when I saw how well the themes go together! I cannot wait for a picture of the two sisters to go in the frame (I didn't gift the frame with the picture of my sisters and I.)


For the flower detail I added glued pink beads to the flower.

I added the ribbon at the last minute and it was the perfect finishing touch for the frame!
These frames are very fun to make and allow me to use a different part of my creative side when deciding how to embellish them. When I know who I am giving them to I can try to make them "match" the decor of the person's home where they will hopefully be displayed. I am considering making and selling these on Etsy, as I can see they would be a great gift to buy for someone! What are you thoughts? Do you think these could sell on Etsy? Given my lack of free time for making product above my gift giving may make this idea just be one of those ideas I aspire to when I have an abundance of time (something that doesn't exisit when working 12 hr night shifts) and my frame making will remain for personal gift giving...we shall see. I am still interested what you think so let me know in my comments! Thanks!

Sunday, December 19, 2010

cake pops


Cake pops are the hottest fashion for serving your favorite cake. Between cupcakes, cake pops and whoopie pies; cake is sure taking the center stage on many websites, blogs, shops, and even TV shows! For my work Christmas party I wanted to contribute something fun and festive and of course have the opportunity to bake so I decided to make cake pops. Let me just tell you that that cake pop making experience may be my first and last! Those puppies are not easy to make. Luckily I did not try to cram it the steps into one day or even two. Please forgive the lack of pictures throughout the steps, I was too focused on trying to get the steps down that I gave up taking pictures after the first step.

Step 1: The first day I made 2 different types of cake red velvet (I thought the red would be fun for Christmas) and chocolate (cause lets face it, who doesn't like chocolate). I could have just made one and it would have been enough, but I learned from my mom and always make too much food for parties, so 2 cakes I had. After they cooled I stored them to use later for step 2.

Step 2: I crumbled each of the cakes into their own bowl using a fork. For the red velvet cake I mixed a jar of cream cheese frosting. (This made a really soft mixture and I would recommend using 2/3 -3/4 of the jar of frosting rather than the whole thing.) The frosting mixes in completely so eventually you don't see the frosting and it is about the consistency of cookie dough. For the chocolate cake I mixed in 2/3 jar of milk chocolate frosting. This yielded a much better consistency for step 3.

Step 3: Step 3 is done on the same day as step 2. You can use a spoon or a small ice cream or cookie dough scoop would be helpful to take a piece of the cake mixture and roll it into a ball (Mine where about the size of a ping pong ball but they could definitely be smaller.) Place on a lined cookie sheet or cake pan. Once the pan is full place in the refrigerator or freezer (I had read that the freezer makes them too hard but my fridge didn't get them cold enough to do step 4, so I had to put them in the freezer). Leave them chilled.

Step 4: This step can be done the day before you wish to serve them or even the day of. Using a double boiler, melt chocolate (I used colored chocolate from Micheal's Craft Store). Not until the chocolate is melted should you take the cake balls out of their chilled location. Place the cake ball on a stick to make it a cake pop or leave alone to have just a cake ball. Cover the ball or pop in the melted chocolate then if desired immediately sprinkle with some decorative sugar sprinkles, or candy, or whatever! I allowed mine to harder while stuck in a Styrofoam block; if you decided to have them cool while lying on wax paper you will have a flat side to your ball. Once they cooled and the chocolate hardened I gently layed them flat on a cookie sheet and covered in plastic wrap.

Step 5: This step should be done the day you plan to serve them. This step was the most fun part for me, it's all about the display! I decided to make a cake pop bouquet with mine. I placed Styrofoam into a Christmas-y container and then covered the foam with shredded paper and red tinsel-y strips. The cake pops where placed into the foam and stayed pretty well (that is until I had to put the arrangement into my car and drive to the party and it fell over : (, luckily not too much damage was done and they still tasted great! I have also seen people place the cake pops upside down or the cake balls themselves in cupcake wrappers. You can get creative with how you display your cake pops/balls and regardless of how they are displayed everyone will be excited to eat them!

Cake Pop Bouquet!

Here you can see the moist cake inside with the sprinkle covered white chocolate outside!

Saturday, December 18, 2010

one week left

7 little flaps left to fold back til it's Christmas!

This is the advent calender I made to count down for Christmas this year, as you can see there is so little chocolates waiting for me each morning, just a little tab. I originally planned to put an activity behind each flap or a quote but that did not get done yet, I can always add it for next year as this Advent calender can be used year after year!


I embellished the Advent Calender with die cut reindeer, and snow flakes as well as some glidder glue for the snow on the roof and the snow flakes. After the flap is folded back each day, a Christmas pattern is revealed on the paper behind.

Wednesday, December 8, 2010

deck the halls

My apartment is all decorated for Christmas and I love it! I wish it could be Christmas year round and I could enjoy the smell of pine, the lighted Christmas tree, and Christmas movies and music every day! Everyday events such as watching tv or having dinner seem that much more special with a beautifully decorated and lighted Christmas tree illuminating the room. To celebrate the start of the Christmas season I had the States Family, Pati, Leith, and Isaiah, over for dinner; here are some pictures from the night!

Table set for dinner with my Spode dishes

My Apartment all decorated!

Father and Son

Happy Family


Isaish wants some brownie & ice cream too!

Thursday, December 2, 2010

rockin' around the Christmas tree

Thank goodness to Home Depot my 2010 Christmas tree was found! Last year I found a great tree at Target and for some reason Target (at least in San Diego) is not selling live Christmas trees this year. What was even better for the Christmas tree search is that Home Depot is right next to Target. They had a HUGE selection of both Noble and Douglas Fir trees. Our family has typically always gotten Douglas fir trees, as did I last year, but this year a cute little 5 ft. Noble was calling my name. I have to say it was much lighter than my tree last year which made carrying it into my apartment alone much easier!


Once in the apartment it was base, water, lights, topper, skirt, and then the ornaments!


All my ornaments, I have collected over the years from childhood, including my 'Baby's First Christmas' ornament, which makes for a special tree. Each year my parents and grandparents gave me an ornament, so I have quite the collection. As I got into middle school my mom would try to pick out an ornament that symbolized that year or a major event in that year. It is always very special to unwrap the ornaments from their tissue paper each year at Christmas time and recall special memories that certain ornaments bring up!

Saturday, October 30, 2010

trick-or-treat!

It is Fall here in San Diego, the air is cooler, crisp and it "smells" of Fall.
So far this Fall I have been enjoying...

Disneyland at Halloween time (more to follow on this)...

Fall decorations...

pumpkin spice scented candles...

pumpkins...

and a new yummy treat...pumpkin ice cream a la Trader Joes!

hAppY hAlloWeeN!

Sunday, October 3, 2010

bookshelf makeover

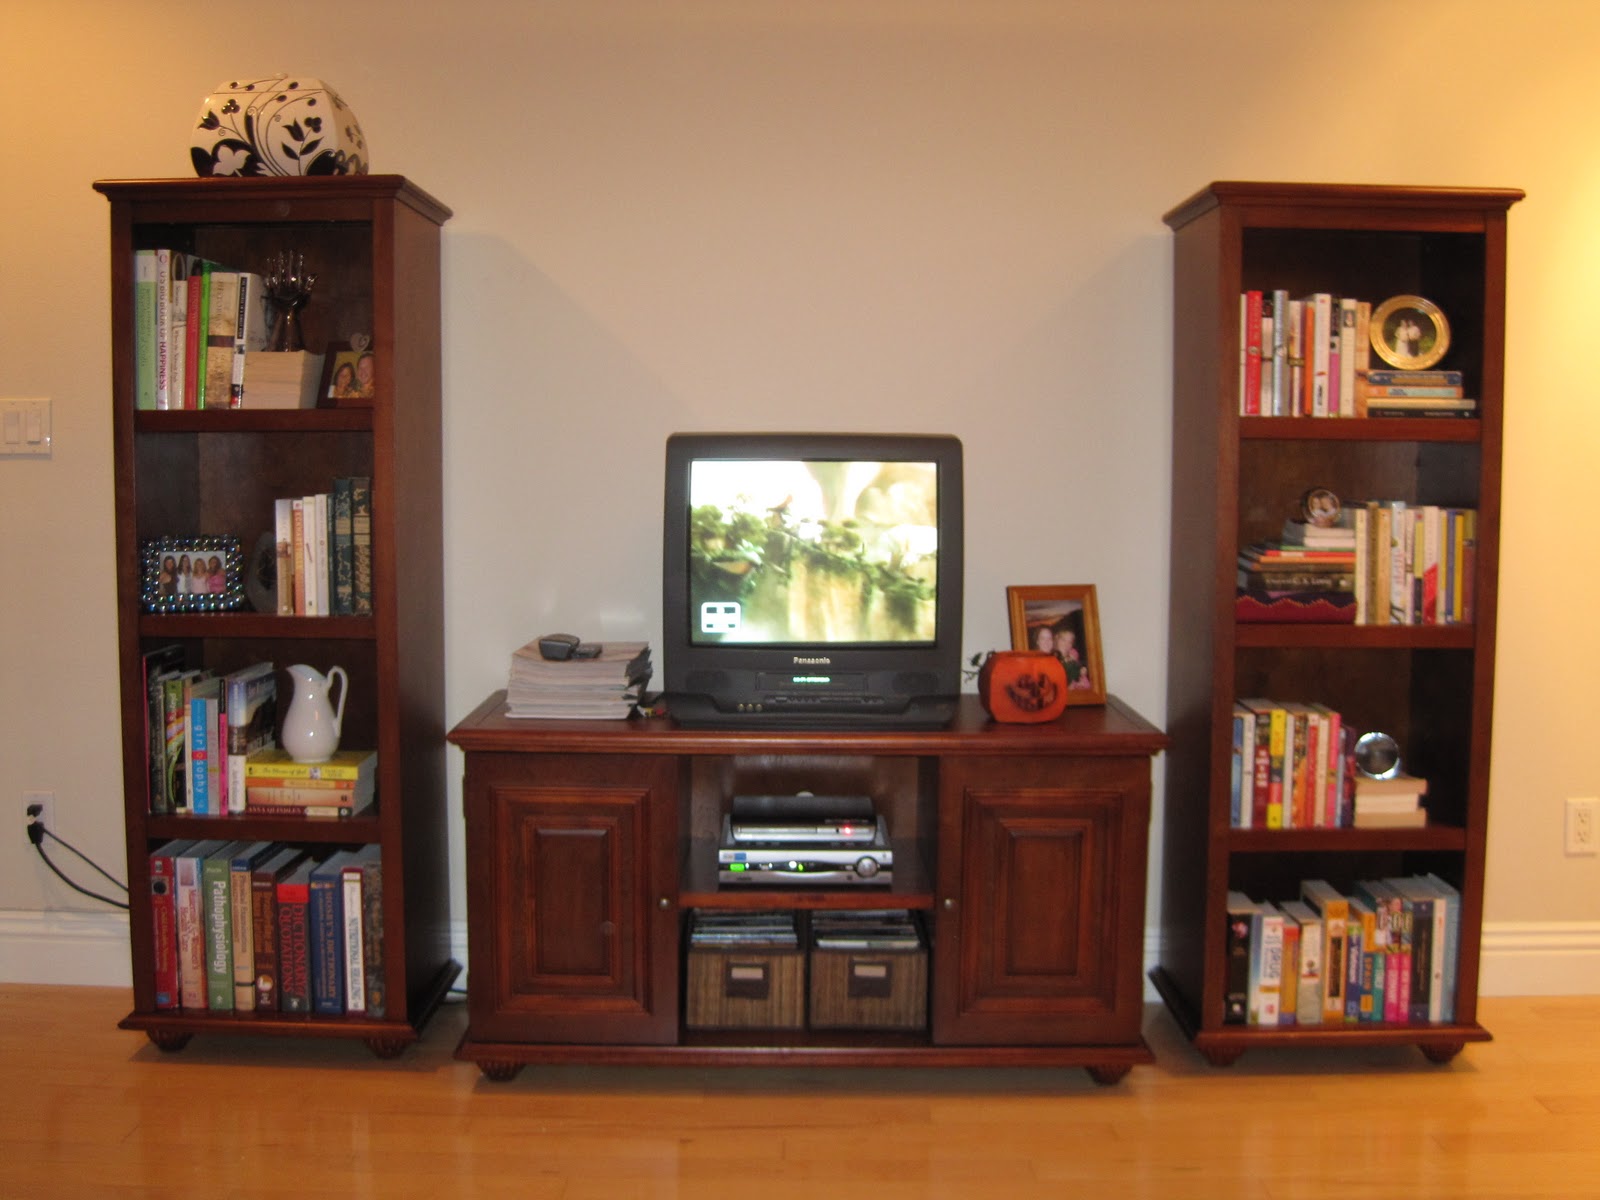
I was feeling the need to change up the bookshelves that stand tall on either side of my tv/media area. When I first set it up I displayed the books and nick nacks in every which way as seen below.


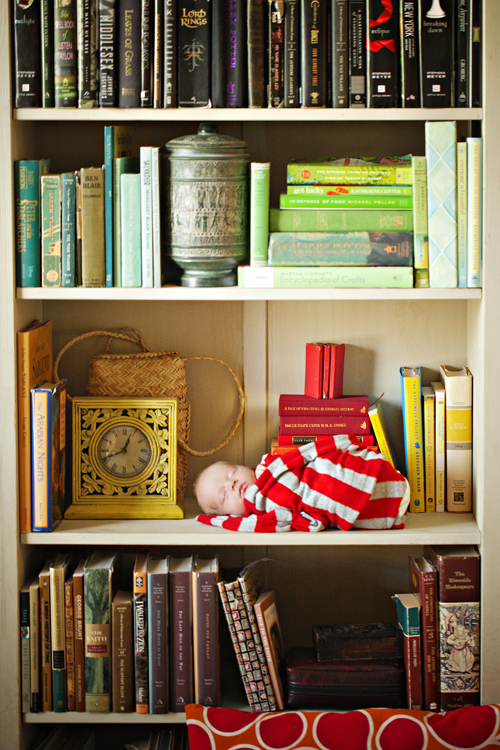
After seeing this picture on Design Mom, I thought it may be fun to color block the books on my bookshelf. This is the result...I'm kinda liking it!